
In this article from our ‘Classic Techniques’ series, we’re examining one of the most distinctive sample techniques to emerge in the 1990s – the timestretched jungle vocal.
The frenetic beats and earth-quaking sub-bass of drum and bass have become a global-dominating sound and the genre continues to develop in new and interesting ways. Drum and bass was born from Jungle, which first developed out of hardcore breakbeat rave music in the early to mid-90s. It was a hugely fertile and productive time for dance music, as the price of decent home equipment dropped and producers delved deep into the submenus of their kit to shape their sounds to their precise desires. This was particularly noticeable in the Jungle genre, as junglist producers embraced the idea of the studio as a lab and their role as that of sonic scientist, and it seemed that each new release raised the bar with the cut-up and fractured breaks manipulated to new levels of poly-rhythmic intensity.
One of the many studio innovations that Jungle bought was the introduction of a brand new sonic texture to the producer’s toolbox, that of the time-stretched vocal. It’s a very distinctive sound and instantly recognisable, where a vocal sample is stretched out and in the process gains a stuttering, metallic sheen which sounds futuristic and robotic.
Hardcore Junglism!
Dead Dred’s ‘Dred Bass’ on Suburban Bass is usually acknowledged as the first Jungle record to feature the time-stretched vocal effect, and you can hear it in countless other Jungle tunes from the likes of Shy Fx, Origin Unknown, DJ Hype, Remarc and so on. It also became popular in house music and featured in many records, including Josh Wink’s acid banger ‘Higher State of Consciousness’. UK Garage was also happy to adopt it, notably on Armand Van Helden’s Remix of ‘Spin Spin Sugar’ and Double 99’s massive ‘RIP Groove’ from 2001.
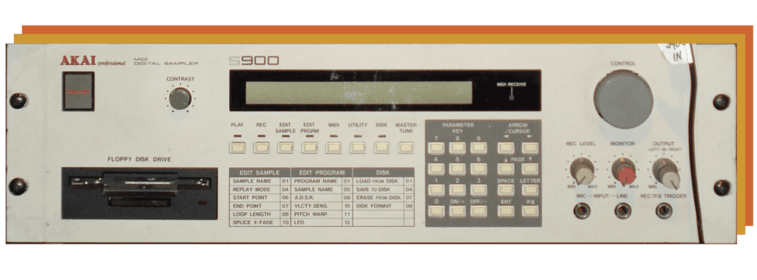
Just like many other audio innovations in dance music, the Jungle time-stretch vocal was the result of a piece of studio equipment being stretched beyond its own capabilities. The technique was actually the sound of the time-stretch algorithm from the Akai S series samplers, being pushed way beyond its normal limits and producing audible ‘artefacts’. As the BPMs and complexity in Jungle steadily rose, so did the demands on the Akai’s time-stretching functions, and that distinctive robotic, shimmering sound was the lucky result.
Warp Factor 9
Audio technology has of course vastly improved since the birth of Jungle and all DAWs now come with time-stretching and warping abilities that allow users to change the pitch and tempo over a vast range, with little if any noticeable degradation to the original sound. Audio warping and time-stretching software now aims to eliminate any audible artefacts to maintain sonic integrity and the original characteristics of the sound, particularly for vocals. But for us to get anything approaching this Jungle time stretch effect, we’re going to have to deliberately circumvent the innovations of the last 20 years, and try to achieve an un-natural vocal sound.
As with many sampling techniques, there are often several methods of achieving the same end, and it’s the same with this; so we’re going to supply some of the most straightforward methods to get results quickly.
In Ableton Live, if you were going to warp a vocal sample, you would usually reach straight for the ‘Pro-Complex’ setting to ensure that it sounds as natural and unprocessed as possible. However for this technique, we’re not looking for pristine vocal processing that you don’t notice, we want to achieve the opposite, we want this to be all about the sound of the processing itself and not the sound of the vocal. To achieve this you will need to select the ‘Tones’ warp mode. Then you can simply change the length of the loop and click on a marker on the sample to stretch it out as long as you like. You’ll quickly hear all the aliasing and achieve the stuttering, metallic sound we’re talking about. Ableton allows you to alter the ‘grain size’ – you can think of grains as tiny snippets of audio used to create a larger waveform. Experimenting with the grain size will get you the effect you’re looking for here, generally, a higher grain size will create that particular stutter effect we’re looking for. Adjusting the grain size also contains the potential for all sorts of far-out vocal processing too.
In Cubase, you right click your sample, click process to enter the time-stretch menu and select the ‘Standard’ algorithm. Aside from the grain size, Cubase also allows you to adjust the ‘overlap’ and ‘variance’ which are controls to help the results to sound as natural as possible: in this case, low values of each will be appropriate. Again, try experimenting with high grain sizes to get the Jungle time-stretch effect.
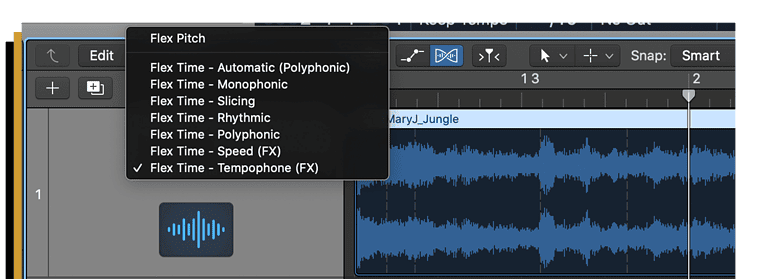
Logic Pro’s Flex allows easy stretching and warping of vocals and again, here it’s about reducing the software’s ability to do the job seamlessly. So select ‘Tempophone’ mode and just by selecting and stretching an area you can easily get a sound that approaches the 90s Jungle feel. The default grain size of 45 ms is perfect for this but Logic also gives you control over the size, so again, you can experiment with this setting for more extreme vocal effects.
Reason’s slice markers allow for all sorts of stretching and warping, although abusing the software to affect the sound in this way is slightly more involved, as Reason’s automatic warping doesn’t seem to allow you to degrade it in the way you can in Logic or Ableton. Luckily there’s another neat trick you can do instead to approximate the Jungle time stretch effect – and this trick will work in any DAW you like: First, you load your sample up, then in your sequencer draw a long line of 32nd notes next to each other, each with zero attack and release. If you then press play on the sequencer and automate the sample start point, it will produce a fair approximation of the Jungle time-stretch sound as the sample continually re-starts from a slightly different point. Adding a little delay and reverb will help mesh the sound together. You may also find that a hint of flanger can also add an authentic metallic sheen to your sound.
As an additional option, there’s also a very good freeware plugin called Akaizer that’s available for all platforms (Windows, Linux and OS X) which can time stretch (and/or pitch shift) any WAVE or AIFF sound file in the style of the ‘cyclic’ time stretch which featured on old Akai sound samplers, like the S950 / S1000 / S2000 / S3000 series. It’s definitely worth checking out and in our tests yielded some pretty authentic sounding results. However, please be aware that as Akaizer is freeware, it’s not supported by 64bit systems and may not work with your current OS.
The Jungle time-stretched vocal is a hugely evocative sound that can instantly transport you back to the mid to late-90s club scene. However, it is also a technique that still sounds unarguably futuristic and your DAW will allow you enough control over the various parameters to take this technique and develop it way further if you wish. Alternatively, you can easily achieve that classic sound and give your tunes that 90’s Jungle flavour with ease. Get up and get stretching!

The UK Garage style of Cut-Up Vocals is one of the genre’s distinctive elements, and the skippy, soulful refrains can be an extremely effective technique that can really revitalise a remix or an original project. We look into producing your own cut-up vocal, UK Garage style.
The Garage cut-up vocal is a technique where a producer takes a vocal sample, slices it up into tiny parts and then re-constructs it into a staccato vocal melody, sometimes even mutating it so there are no actual recognisable words. It’s a sound which came to characterise UK Garage and has since been picked up and used in many other genres too.
A very early example of this technique is the vocal refrain in MK’s Dub of Doom of Nightcrawler’s ‘Push The Feeling On’ from 1992, a tune so successful that you can still hear it being played any weekend in clubs up and down the country. US producer Todd Edwards further developed the technique incorporating folk, disco and even samples of gregorian monks into his productions. Records like his 1996 release ‘Saved My Life’ feature a set of vocal samples that have been chopped up, filtered, panned, pitched and re-arranged, before being quantised in his distinctive skippy style.
In the late nineties, Sunship picked up the baton, lending his immediately recognisable vocal reworking to the likes of Craig David, Mis-Teeq, M-Dubs, and so many others, with probably the best example also resulting in his biggest hit, ‘Flowers’ for Sweet Female Attitude.
There are two basic approaches to producing this effect – you either chop up your audio sample by hand, or, thanks to the power of modern technology, you can let your software analyse the audio and chop it up for you. If you’re doing it by hand (which we’d recommend since that’s the authentic way) take the time to get in close when trimming the samples so that you aren’t leaving tiny gaps at the beginning of the clips, as these may start to be noticeable and result in sloppy timing when you come to quantising. Any unintended gaps at the beginning of audio samples can lead to a naturally swung,rough groove that’s not in perfect time and so lends itself well to the sensibilities of garage.
Vibes N’ That…
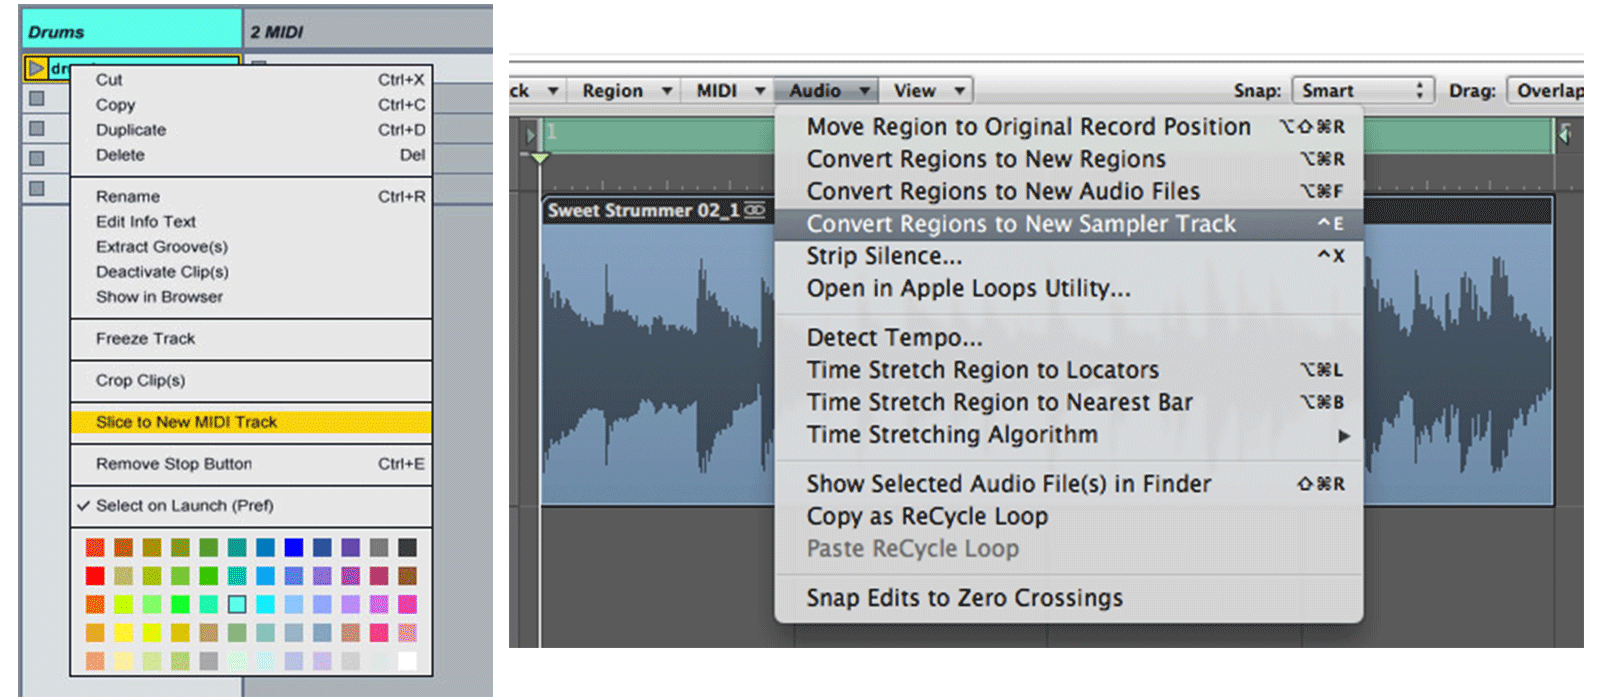
If you prefer, your DAW will happily assist you and make the process much simpler and take less time: One quick method in Ableton LIVE is to right click an audio sample and select ‘Slice to New Midi Track’ – LIVE will analyse the audio and cut it up into slices (based on timing or on transients, you decide) giving you a pre-sliced set of vocals to jam with. In Logic you can use the transient detection engine by right-clicking on an audio sample and selecting ‘Convert Regions to New Sampler Track’, and again, you can specify to split the audio up by transients or by a specified note setting. Alternatively, you can convert your audio to a REX file and map the individual slices to particular notes.
This technique usually involves small snippets of sound rather than full sentences or even words – so the first task once you’ve chopped up your sample, is to listen through and see if you can identify any interesting sounds or textures you might want to use. And don’t ignore the parts between the words, the breaths and also the plosives (the ‘p’ sound at the beginning of a word) can be really punchy and form great little percussive details, especially when compressed. Use a combination of softer vowel sounds and consonants which tend to be a bit more percussive. Ad-libs tend to be very useful for this purpose, since ad-libs are generally sung in the most emotive and expressive way and so lend themselves well to creating new, soulful phrases.
Once you’ve selected a few sounds, map them across your keyboard or assign them to the pads of your controller and you can jam along to your track or move them around on the screen while the track is playing to find something that works. This is very much trial and error but the beauty and fun here is that once you abandon the original meaning of the words there are no ‘wrong’ ways to do it. Once you’ve got a basic pattern down, you can experiment with adding additional layers of vocals to fill in any gaps.
A little reverb or delay will help the vocal samples sit in the mix – but you might also want to consider processing each vocal part individually, applying different effects, panning, EQ or filtering to each clip. You could experiment with a long-tailed reverb on one part and a short gated verb on another, and then pan them opposite each other. A further step would then be to automate the effects so that the slices of vocal popping in and out of the mix mutate as the track plays – perhaps through a phaser with a slow envelope or an automated low pass filter.
Pitch Perfect
Pitch shifting is another important big part of this technique. UK Garage was full of ‘chipmunk’ vocals, where the voice was artificially pitched-up to almost comical effect. But producers also began altering the pitch of individual vocal snippets. Applying individual pitch adjustments to your vocal slices changes the human voice into just another lead instrument that you can use to compose riffs or melodies with. Getting this to work in your productions will likely involve a little time – you’ll need to transpose individual sounds to change the melodic content and experiment in your piano roll window with moving the samples around to achieve a result you like. And remember you don’t just have to pitch vocals up, pitched down vocals can sound superb too, and the contrast between vocal clips that have been pitched up and down can sound particularly effective.
A lot of producers will compress their sampled vocals heavily, to ensure that all the sounds are punchy, clear and cut through the mix. The human voice is notorious for having a large dynamic range, so, depending on the source material of course, it’s likely that your sampled vocals parts will benefit from some compression to even out the dynamics.
Swings And Roundabouts
There is one more crucial element it achieving the Garage cut-up vocal sound, and that is quantisation. Once you warp the words so that they are no longer intelligible and turn the vocal sample into just another instrument, then you can quantise it to any setting you wish. Garage is characterised by its heavily swung rhythms and this swing is often applied to the cut-up vocals to give them that same skippy feel. When you’ve got your vocal snippets in place, try 16th note quantisation but with substantial swing – perhaps 60% – and see how it sounds. It’s really a question of personal preference and plenty of DAWs come with a number of different good quality quantise presets that are worth trying out too. To get the vocals sitting tight in the arrangement, use the same swing setting as you use for your drums, or lower the swing setting on the vocal samples for a looser feel.
The human voice provides a rich tapestry of textures and rhythms for the producer, especially once you can move away from recognisable words into using the voice as just another piece of audio to be manipulated. Just listen to producers like Sunship, Scott Diaz, Four Tet or Burial, who’ve finessed and developed the chopped up vocal template in new exciting and emotive directions.
Try chopping, pitching, panning, EQing and quantising some cut up vocals today, and see if you can get some of that UK Garage swagger and swing into your productions. Check out our selection of garage packs here.