We look at six of the very best albums in the Future Garage genre.

UK Garage is one of the UK’s most potent musical creations. Emerging in the late 90s, exploding in the early 2000s, often bothering the higher reaches of the pop charts and then splintering into a multitude of different creative directions, UKG contained the roots of grime, dubstep, UK funky and bassline. 

UKG’s popularity has fluctuated over the years, but there’s no denying its continued presence in its many varied forms, as well as its lasting impact on the continued progression of UK club music. In the late 2010s, a fresh take on the UKG sound began to be heard – Future Garage. It’s a genre that can be tricky to categorise, and as is often the case with these things, there’s plenty of discussion about what may or may not constitute Future Garage. It’s a term that has been used to describe a wide range of electronic music and one which has proved divisive amongst producers and artists, but broadly speaking, we’re referring to a UK garage sound that drew heavily on 2-Step and was also influenced by the sonic developments of dubstep. Future Garage eschewed dubstep’s wobble-bass obsession, and instead drew inspiration from Detroit techno and dub and other electronic genres, often pursuing a more restrained and emotive aesthetic. Much like its predecessor UKG which borrowed from RnB, jungle and dancehall, and from the original US garage sound, FG encompasses elements from several other genres, weaving in and out of various dub inspired electronic music. 

In marked contrast to the champagne/glamour and party atmosphere of early UKG, Future Garage was often more introverted, mournful even, taking pointers from that post-dystopian vision of the future that had proved to be so fruitful for Detroit techno producers, but reframing it in a distinctly UK setting. FG has often been defined by stand-out singles and EPs and the producers making it often work across several genres – for this reason, it’s tricky to pick albums that are only Future Garage; as a result, we’ve picked albums that include a fair number of future garage style tracks, even if the entire album isn’t in that style. Here are our picks, starting with the earliest release first:

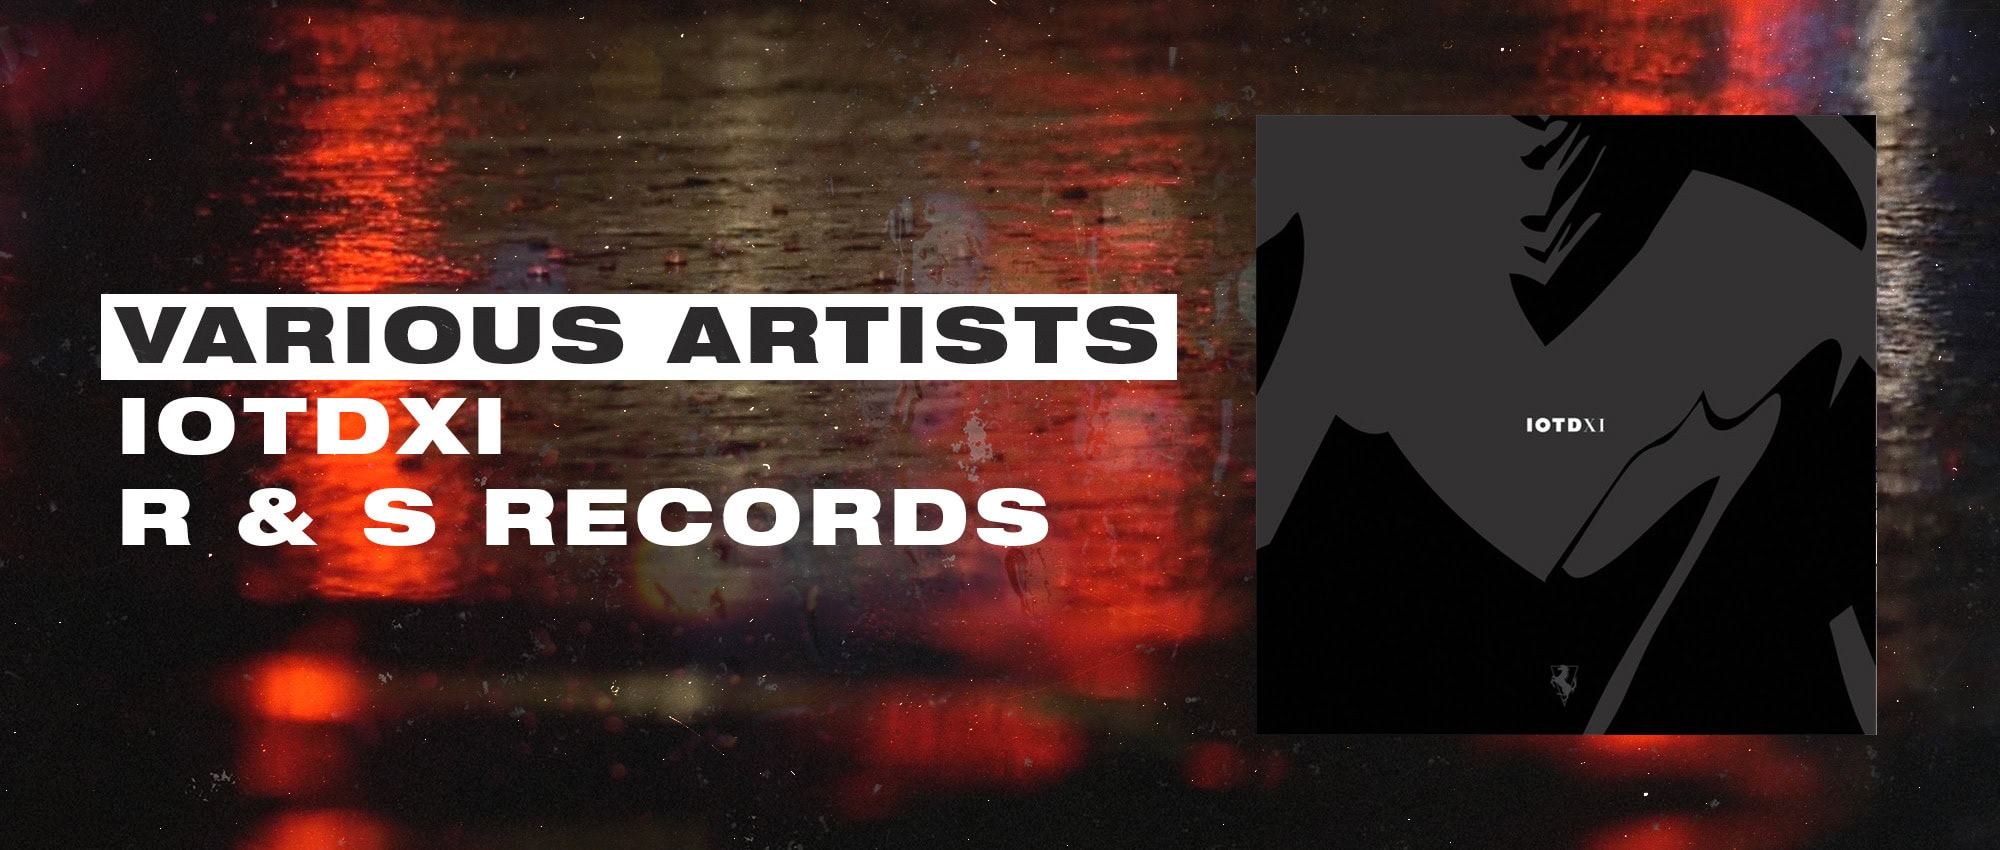
Various Artists – IOTDXI / R&S Records (2001)

Compilation albums are always an important part of the process of defining and codifying new genres, and this set of eighteen-months-worth of R&S’s forward-thinking releases featured some genre-defining moments. ‘IOTDXI’ included huge tunes like James Blakes’ queasy ‘CMYK’ – which somehow seemed to meld RnB effortlessly into the UK bass music tradition – and his influential ‘I Only Know – What I Know Now’ from 2010’s four-track Klavierwerke EP. Blake’s work at the time was particularly influential; he was creating huge, spacious pieces of music with a curiously detached emotionality to them, learning from the confidence of dub to leave gaping spaces in the music, and bringing in a sombre musicality via warped piano samples and mutated vocal snippets. 

Musical highlights include Cloud Boat’s lush ‘Lions On The Beach’ and two sterling productions from Yorkshire’s own Blawan with the rattling shuffle-funk of his broken-garage stormer ‘Shader’ and the raw, acid-soaked ‘Bohla’ both making a welcome appearance. Pariah also contributes a couple of tracks, the stand out being the classic heavily swung beats and heart-wrenching vocal sample of the anthemic ‘Orpheus’. ‘IOTDXI’ was a compilation with many high-quality Future Garage moments, that clearly demonstrated how adeptly R&S were navigating the new bass music of the period.

Burial – Burial / Hyperdub (2006)

Burial’s self-titled debut album dropped in 2006 and in his production innovations he laid the FG template, taking pieces of UKG, dubstep, 2-step and jungle and creating a claustrophobic, yearning and gracefully adept collection of futuristic bass music. The particular trick that Burial’s debut album performed so well was to place agile, agitated garage rhythms on top of deep, emotive electronic and sampled soundscapes. In doing so he achieved a new level of emotionalism and atmosphere in his music, creating a ‘mood blueprint’ that many others went on to follow.

Although ‘Burial’ was perhaps not as accomplished as follow up ‘Untrue’, its ethereal, otherworldly atmosphere, emotion-heavy production, and the way it reworked various elements of UK bass music into new shapes, defined what would come to be called Future Garage. 

Burial – Untrue  / Hyperdub (2007)

‘Untrue’ was Burial’s masterwork, an actual, genuine game-changer of an album and a hugely influential release when it dropped in 2007. ‘Untrue’ was what happened to UKG when the party finished. The tracks are muted, understated and thick with atmosphere, set to the constant hum of the city at night, the crackle of vinyl, the hiss of drizzle. 2 step loops swathed in reverb, woodblock rhythms encrusted with a layer of audio dirt, scuzzy skippy garage beats matched with samples that somehow spoke of longing and melancholy; it’s genuinely sad, but with moments of strained euphoria. ‘Burial’ is not exactly what you would call a catchy collection of tracks, but that said, many of the melodies and vocal samples remain with you long after listening, and Burial is not averse to some blatant musical heart-string tugging when required. 

‘Untrue’ opened the door for other artists and producers to put the human voice back into post-dubstep. It’s bold, highly emotive and sounds as good today as the day it was released.

Sepalcure – Sepalcure / Hotflush (2010)

The ten tracks that make up Sepalcure’s 2010 debut album contained much to be excited about. From the album opener ‘Me’ – all skippy drums, gently pulsing synths and warm pads a la Detroit, together with chopped vocal samples and of course some serious low end – through all ten tracks, the album tours the various flavours of the UK bass music scene.

Simultaneously looking backwards and forward, ‘Sepalcure’ reworked contemporary bass music trends and tropes into detailed and rich productions that effortlessly flirted with dubstep, garage and house. It stood up to repeated listening too, featuring high levels of musicality, the synth lines and bass rumbles wrapped in rich chords, the vocal melodies much more than mere added-on samples. And through it all, ‘Sepalcure’ breezily moves between euphoria and the sense of unfocused yearning that permeates so much FG. ‘Sepalcure’ was a strong debut, one that summed up much of what was great about UK dance music at the start of the 2010s.

 Various Artists – 116 And Rising / Hessle Audio (2011)

Ben UFO’s Hessle Audio label has always taken an openminded approach to A&R, as demonstrated by their first compilation which featured a wide range of high tech electronics including a clutch of quality Future Garage. Here we get treated to killer tracks like Blawan’s ‘Potchla Vee’, a neat summing up of his particular niche of the FG spectrum: heavy-hitting razor-edged 2-step derived beats, techno-esque stabs and pads and that distinctive layer of atmospheric noise. Randomer’s taut minimalist take on post-garage, ‘Brunk’, showcased his stripped-back diamond-hard beats that hit with all the energy of a UK rave dance floor circa ’91. The tense, catapulting beats and overly pitch-adjusted vocals of James Blake’s ‘Give A Man a Rod – 2nd Version’ is also included on a compilation that provided a vivid sonic snapshot of some truly innovative forward-thinking dance music. This is FG distilled to its purest level; raw garage beats broken into new configurations with the most minimalist of synth and sample decoration, drawing together strands of UK bass music history and presenting them in fresh and novel forms.

James Blake – The Colour In Anything / Polydor (2016)

Blake has always been a producer who connects the dots between genres and whose work deliberately blurs the boundaries between musical styles, in the process redefining new musical areas. Whilst there are tracks on this superb long-player from 2016 that in terms of drum programming aren’t strictly Future Garage, in terms of the texture, tone and mood there’s much here that fits the aesthetic very well indeed.

‘The Colour In Anything’ is pure-emo electronica, Blake twisting his synths, samples and vocals for maximum evocative impact whilst paying a heavy debt to the sonics of garage and dubstep. With seven of the seventeen tracks co-produced by US producer Rick Rubin and much of the mastering taking place in Malibu, ‘The Colour In Anything’ presented an altogether more expansive sound for Blake. He successfully managed to give his productions – which were always the sounds of England’s capital city – a more global setting, but ‘The Colour In Anything’s sentiment-drenched mood, it’s layers of noise, hum and crackle, and its effected vocals were still very much the sound of Future Garage.

Be sure to check out our  ‘Future Garage & Shifted Beats’ and ‘Garage, M8’ sample collections today.

In this article from our ‘Classic Techniques’ series, we’re examining one of the most distinctive sample techniques to emerge in the 1990s – the timestretched jungle vocal. 

The frenetic beats and earth-quaking sub-bass of drum and bass have become a global-dominating sound and the genre continues to develop in new and interesting ways. Drum and bass was born from Jungle, which first developed out of hardcore breakbeat rave music in the early to mid-90s. It was a hugely fertile and productive time for dance music, as the price of decent home equipment dropped and producers delved deep into the submenus of their kit to shape their sounds to their precise desires. This was particularly noticeable in the Jungle genre, as junglist producers embraced the idea of the studio as a lab and their role as that of sonic scientist, and it seemed that each new release raised the bar with the cut-up and fractured breaks manipulated to new levels of poly-rhythmic intensity. 

One of the many studio innovations that Jungle bought was the introduction of a brand new sonic texture to the producer’s toolbox, that of the time-stretched vocal. It’s a very distinctive sound and instantly recognisable, where a vocal sample is stretched out and in the process gains a stuttering, metallic sheen which sounds futuristic and robotic.

Hardcore Junglism!

Dead Dred’s ‘Dred Bass’ on Suburban Bass is usually acknowledged as the first Jungle record to feature the time-stretched vocal effect, and you can hear it in countless other Jungle tunes from the likes of Shy Fx, Origin Unknown, DJ Hype, Remarc and so on. It also became popular in house music and featured in many records, including Josh Wink’s acid banger ‘Higher State of Consciousness’. UK Garage was also happy to adopt it, notably on Armand Van Helden’s Remix of ‘Spin Spin Sugar’ and Double 99’s massive ‘RIP Groove’ from 2001.  

Just like many other audio innovations in dance music, the Jungle time-stretch vocal was the result of a piece of studio equipment being stretched beyond its own capabilities. The technique was actually the sound of the time-stretch algorithm from the Akai S series samplers, being pushed way beyond its normal limits and producing audible ‘artefacts’. As the BPMs and complexity in Jungle steadily rose, so did the demands on the Akai’s time-stretching functions, and that distinctive robotic, shimmering sound was the lucky result. 

Warp Factor 9

Audio technology has of course vastly improved since the birth of Jungle and all DAWs now come with time-stretching and warping abilities that allow users to change the pitch and tempo over a vast range, with little if any noticeable degradation to the original sound. Audio warping and time-stretching software now aims to eliminate any audible artefacts to maintain sonic integrity and the original characteristics of the sound, particularly for vocals. But for us to get anything approaching this Jungle time stretch effect, we’re going to have to deliberately circumvent the innovations of the last 20 years, and try to achieve an un-natural vocal sound. 

As with many sampling techniques, there are often several methods of achieving the same end,  and it’s the same with this; so we’re going to supply some of the most straightforward methods to get results quickly.

In Ableton Live, if you were going to warp a vocal sample, you would usually reach straight for the ‘Pro-Complex’ setting to ensure that it sounds as natural and unprocessed as possible. However for this technique, we’re not looking for pristine vocal processing that you don’t notice, we want to achieve the opposite, we want this to be all about the sound of the processing itself and not the sound of the vocal. To achieve this you will need to select the ‘Tones’ warp mode. Then you can simply change the length of the loop and click on a marker on the sample to stretch it out as long as you like. You’ll quickly hear all the aliasing and achieve the stuttering, metallic sound we’re talking about. Ableton allows you to alter the ‘grain size’ – you can think of grains as tiny snippets of audio used to create a larger waveform. Experimenting with the grain size will get you the effect you’re looking for here, generally, a higher grain size will create that particular stutter effect we’re looking for. Adjusting the grain size also contains the potential for all sorts of far-out vocal processing too.  

In Cubase, you right click your sample, click process to enter the time-stretch menu and select the ‘Standard’ algorithm. Aside from the grain size, Cubase also allows you to adjust the ‘overlap’ and ‘variance’ which are controls to help the results to sound as natural as possible: in this case, low values of each will be appropriate. Again, try experimenting with high grain sizes to get the Jungle time-stretch effect.

Logic Pro’s Flex allows easy stretching and warping of vocals and again, here it’s about reducing the software’s ability to do the job seamlessly. So select ‘Tempophone’ mode and just by selecting and stretching an area you can easily get a sound that approaches the 90s Jungle feel. The default grain size of 45 ms is perfect for this but Logic also gives you control over the size, so again, you can experiment with this setting for more extreme vocal effects. 

Reason’s slice markers allow for all sorts of stretching and warping, although abusing the software to affect the sound in this way is slightly more involved, as Reason’s automatic warping doesn’t seem to allow you to degrade it in the way you can in Logic or Ableton. Luckily there’s another neat trick you can do instead to approximate the Jungle time stretch effect – and this trick will work in any DAW you like: First, you load your sample up, then in your sequencer draw a long line of 32nd notes next to each other, each with zero attack and release. If you then press play on the sequencer and automate the sample start point, it will produce a fair approximation of the Jungle time-stretch sound as the sample continually re-starts from a slightly different point. Adding a little delay and reverb will help mesh the sound together. You may also find that a hint of flanger can also add an authentic metallic sheen to your sound. 

As an additional option, there’s also a very good freeware plugin called Akaizer that’s available for all platforms (Windows, Linux and OS X) which can time stretch (and/or pitch shift) any WAVE or AIFF sound file in the style of the ‘cyclic’ time stretch which featured on old Akai sound samplers, like the S950 / S1000 / S2000 / S3000 series. It’s definitely worth checking out and in our tests yielded some pretty authentic sounding results. However, please be aware that as Akaizer is freeware, it’s not supported by 64bit systems and may not work with your current OS.

The Jungle time-stretched vocal is a hugely evocative sound that can instantly transport you back to the mid to late-90s club scene. However, it is also a technique that still sounds unarguably futuristic and your DAW will allow you enough control over the various parameters to take this technique and develop it way further if you wish. Alternatively, you can easily achieve that classic sound and give your tunes that 90’s Jungle flavour with ease. Get up and get stretching! 


The UK Garage style of Cut-Up Vocals is one of the genre’s distinctive elements, and the skippy, soulful refrains can be an extremely effective technique that can really revitalise a remix or an original project. We look into producing your own cut-up vocal, UK Garage style.

The Garage cut-up vocal is a technique where a producer takes a vocal sample, slices it up into tiny parts and then re-constructs it into a staccato vocal melody, sometimes even mutating it so there are no actual recognisable words. It’s a sound which came to characterise UK Garage and has since been picked up and used in many other genres too.

A very early example of this technique is the vocal refrain in MK’s Dub of Doom of Nightcrawler’s ‘Push The Feeling On’ from 1992, a tune so successful that you can still hear it being played any weekend in clubs up and down the country. US producer Todd Edwards further developed the technique incorporating folk, disco and even samples of gregorian monks into his productions. Records like his 1996 release ‘Saved My Life’ feature a set of vocal samples that have been chopped up, filtered, panned, pitched and re-arranged, before being quantised in his distinctive skippy style. 

In the late nineties, Sunship picked up the baton, lending his immediately recognisable vocal reworking to the likes of Craig David, Mis-Teeq, M-Dubs, and so many others, with probably the best example also resulting in his biggest hit, ‘Flowers’ for Sweet Female Attitude.

There are two basic approaches to producing this effect – you either chop up your audio sample by hand, or, thanks to the power of modern technology,  you can let your software analyse the audio and chop it up for you. If you’re doing it by hand (which we’d recommend since that’s the authentic way) take the time to get in close when trimming the samples so that you aren’t leaving tiny gaps at the beginning of the clips, as these may start to be noticeable and result in sloppy timing when you come to quantising.  Any unintended gaps at the beginning of audio samples can lead to a naturally swung,rough groove that’s not in perfect time and so lends itself well to the sensibilities of garage. 

Vibes N’ That…

If you prefer, your DAW will happily assist you and make the process much simpler and take less time:  One quick method in Ableton LIVE is to right click an audio sample and select ‘Slice to New Midi Track’ – LIVE will analyse the audio and cut it up into slices (based on timing or on transients, you decide) giving you a pre-sliced set of vocals to jam with. In Logic you can use the transient detection engine by right-clicking on an audio sample and selecting ‘Convert Regions to New Sampler Track’, and again, you can specify to split the audio up by transients or by a specified note setting.  Alternatively, you can convert your audio to a REX file and map the individual slices to particular notes. 


This technique usually involves small snippets of sound rather than full sentences or even words – so the first task once you’ve chopped up your sample, is to listen through and see if you can identify any interesting sounds or textures you might want to use. And don’t ignore the parts between the words, the breaths and also the plosives (the ‘p’ sound at the beginning of a word) can be really punchy and form great little percussive details, especially when compressed. Use a combination of softer vowel sounds  and consonants which tend to be a bit more percussive. Ad-libs tend to be very useful for this purpose, since ad-libs are generally sung in the most emotive and expressive way and so lend themselves well to creating new, soulful phrases.

Once you’ve selected a few sounds, map them across your keyboard or assign them to the pads of your controller and you can jam along to your track or move them around on the screen while the track is playing to find something that works. This is very much trial and error but the beauty and fun here is that once you abandon the original meaning of the words there are no ‘wrong’ ways to do it. Once you’ve got a basic pattern down, you can experiment with adding additional layers of vocals to fill in any gaps. 

A little reverb or delay will help the vocal samples sit in the mix – but you might also want to consider processing each vocal part individually, applying different effects, panning, EQ or filtering to each clip. You could experiment with a long-tailed reverb on one part and a short gated verb on another, and then pan them opposite each other. A further step would then be to automate the effects so that the slices of vocal popping in and out of the mix mutate as the track plays – perhaps through a phaser with a slow envelope or an automated low pass filter. 

Pitch Perfect

Pitch shifting is another important big part of this technique. UK Garage was full of ‘chipmunk’ vocals, where the voice was artificially pitched-up to almost comical effect. But producers also began altering the pitch of individual vocal snippets. Applying individual pitch adjustments to your vocal slices changes the human voice into just another lead instrument that you can use to compose riffs or melodies with. Getting this to work in your productions will likely involve a little time – you’ll need to transpose individual sounds to change the melodic content and experiment in your piano roll window with moving the samples around to achieve a result you like. And remember you don’t just have to pitch vocals up, pitched down vocals can sound superb too, and the contrast between vocal clips that have been pitched up and down can sound particularly effective. 

A lot of producers will compress their sampled vocals heavily, to ensure that all the sounds are punchy, clear and cut through the mix. The human voice is notorious for having a large dynamic range, so, depending on the source material of course, it’s likely that your sampled vocals parts will benefit from some compression to even out the dynamics. 

Swings And Roundabouts

There is one more crucial element it achieving the Garage cut-up vocal sound, and that is quantisation. Once you warp the words so that they are no longer intelligible and turn the vocal sample into just another instrument, then you can quantise it to any setting you wish. Garage is characterised by its heavily swung rhythms and this swing is often applied to the cut-up vocals to give them that same skippy feel. When you’ve got your vocal snippets in place, try 16th note quantisation but with substantial swing – perhaps 60% – and see how it sounds. It’s really a question of personal preference and plenty of DAWs come with a number of different good quality quantise presets that are worth trying out too. To get the vocals sitting tight in the arrangement, use the same swing setting as you use for your drums, or lower the swing setting on the vocal samples for a looser feel. 

The human voice provides a rich tapestry of textures and rhythms for the producer, especially once you can move away from recognisable words into using the voice as just another piece of audio to be manipulated. Just listen to producers like Sunship, Scott Diaz, Four Tet or Burial, who’ve finessed and developed the chopped up vocal template in new exciting and emotive directions. 

Try chopping, pitching, panning, EQing and quantising some cut up vocals today, and see if you can get some of that UK Garage swagger and swing into your productions. Check out our selection of garage packs here. 


Sampling is a significant part of the audio landscape now, but there was a time when it was utterly revolutionary. Indeed, there’s a strong argument to be made that sampling, and the advent of the sampler, was the most radical development in the history of 20th century recorded music. The ability to take a piece of someone else’s recorded audio and use it in your own composition completely transformed the process of making music and was a substantial contributing factor in the birth and evolution of dance and electronic music. Entire genres have been built around just a few samples and a drum machine or sampled drum beat – see French house, techno and hip hop. Jungle/Drum & Bass leant heavily on the use of funk breaks and the ‘Hot Pants’, ‘Apache’, ‘Funky Drummer’, and ‘Think’ breaks as well as the now-ubiquitous ‘Amen’ break – the origin and importance of which much has been written (including a couple of excellent documentaries)


Although artists like the Beatles and others had used tape loops on their records back in the 1960s, it wasn’t until the 1980s that sampling technology caught up with the desires of producers and artists. However, in 1980 you’d need to pay around £20,000 to buy a Fairlight CMI, a digital synth which also contained a rudimentary sampler. But hardware samplers soon dropped in price and increased in functionality. The Akai S-Series of samplers arrived in 1986, just in time to assist Techno, Acid House, Hardcore and Jungle to bloom and develop into the countless sub-genres we have today and it was quickly followed by the iconic MPC, famously used by J-Dilla, Pete Rock and DJ Shadow and responsible for many a hip hop anthem. Whether you know it or not, no matter what type of dance or electronic music you enjoy, Hip Hop, Techno, Jungle, UK Garage or House – you can be almost certain it’s full of samples.Sample It, Chop It, Loop It!

Now, of course, software samplers are standard across all DAWs, and even iOS apps, and it’s an oft-quoted statistic that the processing power we all carry round in just our phones is way more powerful than the computers that got us to the moon and back. Modern software samplers are characterised by the ease by which we can sample any audio and incorporate it into our own work. Pitch, tempo, style – nothing is a barrier – the software will aid you in manipulating almost sample to fit in your track with the minimum of fuss.

All of this means that the landscape of music has altered significantly in the last 30 years, with new technology enabling musicians, producers and consumers to create and interact in new, exciting ways. Nowhere is this more true than in electronic music, where the DJs’ role has now fully merged with that of the producer, with DJs often making use of sampling, looping and re-edits in their sets and many of them releasing music largely based on the grooves and loops of older tracks. This is where legal issues become relevant.

The major issue around sampling is that using another person’s original recordings without their permission constitutes a copyright infringement, for which there will likely be legal consequences. Court cases and claims may well prevent you from ever earning a penny from the work containing the infringing sample if it isn’t cleared in advance. The central issue is covered by the UK Copyright Designs and Patents Act 1988, and can be summed up succinctly as “If it’s not yours, you don’t have the right to use it without permission”. To understand exactly what we can and can’t legally sample, we need to look at this in a little more detail.

The Legal Bit…

The Copyright, Designs and Patents Act 1988 is a set of laws that dictate how creators can control the ways their material can be used (in the UK, under UK law). When a producer uses someone else’s sound recording without their prior permission – ie: when they sample a loop, vocal, instrument, drum beat or even just a single note from someone else’s work – in legal terms it is considered to be:

  1. A breach of copyright in the original sound recording,
  2. A breach of copyright in the music (and lyrics, if lyrics have been sampled),
  3. An unauthorised use of the performances in the original work.

This applies, in theory at least, in all of the following cases:

  • Even if you only used a tiny snippet.
  • Even if you buried it under other lots of other programmed parts.
  • Even if you reversed it, pitched it down and processed it through every single effect you own.
  • Even if you’re pretty sure no one will notice it.

In UK law, we use the doctrine of “substantial similarity”, which means that a substantial part of the copyrighted piece of music has to have been used in order for there to be an infringement. In practice, this might mean that if you sample a single horn hit from someone else’s tune and use it in one of your productions, you might get away with it – but you should know that all major record companies have entire departments, peopled by professional researchers, musicologists and lawyers, whose job it is to find sample infractions and to collect money for them. And if that horn stab was from a famous song, made a substantial contribution to your track, and you’ve not asked for permission, then legally you’ll not have a leg to stand on. There are also ethical and professional considerations too – we wouldn’t like it if someone profited from our work without crediting and remunerating us, so should surely show others the same professional respect as well.

Read The Small Print!

As a general rule of thumb, it’s very likely that any record contract you sign will require you to indemnify (protect) the label against any potential claims arising from copyright infringement. This means that it’s your responsibility to ensure that any samples have been cleared. So you’ll need the permission of the record label and usually the publisher too before you release any sound recording containing the sample. It might be that if the copyright wasn’t assigned to a publisher then you’ll need to track down the original copyright owners – or even their heirs – and bear in mind that some songs have more than one writer, so this can be quite a lengthy process.

It’s common practice these days to employ a sample clearing company who can negotiate a usage rate for you with the record label or publisher – and this is far more sensible than waiting until your tune blows up big and then asking for permission as you will have already broken the law. If you didn’t ask for permission and your tune blows up, it’s entirely possible that the record company legal team will attempt to get a higher percentage, perhaps even 100% of the royalties, than if you’d sought permission. There are also sample replay companies who specialise in uber-authentic recreations of pretty much any record you can imagine. Scorccio‘s recreations are so good, they often have the rightsholder going after the label because they are utterly convinced it’s the original recording.

A sample clearing company will charge you a flat rate and attempt to get you the best deal available. Remember, record companies want to make money, so it’s usually in their interest to strike a deal with people who sample their catalogue. All these considerations shouldn’t deter you from sampling – the big companies are set up for this stuff – you just have to do things the right way. The deal you get will depend on how much of the copyrighted audio you used, how well known the original recording was, the prominence of the sample and the likelihood of your release being successful.

Of course, none of these restrictions apply to legally bought sample packs. When you pay for a sample pack you are paying for a licence to freely use the samples in your own compositions. You can build a track entirely from legally bought samples and even if it’s a huge hit, you won’t have to pay anything provided you purchased the sounds legally to begin with. This is the big advantage of using royalty-free samples over other original published works – once you’ve paid for it, it’s yours. 

There are some limits here though, and again, the law is very clear on this. Most sample providers will have some variation of the following guidelines about what you can and can’t do with the samples you buy: you can use the samples in your own compositions, but you can’t sell, loan, rent, lease, assign, or transfer samples to another user, or use them in any competitive product and potentially library music (although this varies between companies and products). So this means that the licence is non-transferable and you are not allowed to share your sample pack with the rest of the internet or try to sell them as if they were your own.

So that’s our basic guide to the legalities of sampling. We hope you find it useful. If in doubt, you should always seek the advice of the Musicians Union or talk to any of the sample clearance companies online and if you do choose to release a record that contains a sample, our lawyers have advised us to advise you that this article does not constitute legal advice and does not take the place of a qualified music attorney.

Click here to browse our full range of royalty-free collections. 


Continue reading A Guide To The Law & Sampling


1. Start With The Most Important Elements

Decide what the most important elements of your track should be, and begin with those. This way you can start to build a hierarchy that will help you make decisions about what should have prominence – and how much of the ‘landscape’ it should take up. This might sound obvious, but it’s amazing how much we’re generally drawn to the drums as an automatic starting point. Whilst this works for drum & bass and most house or techno, drums are clearly not the focal point in pop, jazz or ambient records and so it really makes no sense to start your mixing process with those. If your song is a pop song, then almost all of the time the vocal will need to be the most prominent element of the mix – if it’s a jazz record, then it’s likely you’ll want to hear the keyboard or the piano as the most dominant instrument. Decide, and then mix accordingly, bringing in each element in order of importance. 

2. Write Drunk, Mix Sober

We’ve all been there – you’re feeling inspired during a late one in the studio, perhaps after a great gig or life-changing night out, but I’d strongly caution against making critical mixing decisions during these sessions. As the old literary saying goes, “write drunk, edit sober”, and I think it’s sound advice for a few reasons: 

Many drugs, especially alcohol, create a false sense of confidence in us, and this extends to our decision making. It’s also been found that (time for the science), alcohol actually changes our hearing response and the linked study notes that “that alcohol impairs the processing of tones, frequency change and novel sounds at different phases of auditory processing similarly in both hemispheres”. Beginning the writing process with the help of intoxicants can be beneficial as we tend to be less inhibited, more in the ‘flow’ state and initially this can help us to be more inventive, more child-like and creative, reducing the insecurity that often plagues us once we start to over-analyse what we’re doing. 

So mixing when intoxicated might be fun, but in my experience, from a critical and technical perspective, it rarely yields good results. Everybody is different, of course, and people react to intoxicants in different ways. You genuinely might do your best work under these conditions and I find it to be true that the more experienced you are, the better you’ll be whatever the conditions. Most of the great music of the ’60s and ’70s (and many other times) was recorded and/or mixed by musicians and engineers high on all sorts of substances. Music and drug culture are inextricably linked and there’s no getting away from that – so if you choose to indulge, please do it in a safe way that minimises the harm to yourself and others. That being said, my advice is always to do final mixes after a good night’s sleep, with fresh ears and a clear head, especially if it’s an area you’re still trying to master and understand.

3. Less Is More – Refine Your Arrangement.

The mixdown process is also a great opportunity to refine your arrangement. My first bit of advice here would be to try and avoid being strictly wedded to a certain arrangement if it hinders your ability to mix the record well. For instance, If you’re having trouble getting a fairly harsh-sounding synth solo to sit with a lead vocal part, whilst you could try eq’ing some of the harshness or lowering the volume of one of the tracks, it might be a better solution to consider moving the synth solo so that it comes in once the lead vocal stops and leaves a more natural space for it. Making these types of creative decisions can save you hours of frustration trying to get 2 parts to play together in a cohesive way. In addition, Once you start to add processing to channels or groups, you may notice that certain parts of the mix now have more energy or an emphasised tonality and should take on a more (or less!) significant role in the overall musical idea. Very often I find that elements that I was set on at the start of the creation process and that I felt would be crucial and basically indispensable to the record can now be removed completely without negatively affecting the overall feel, energy and vibe of the track. If you’re making club-focused music, this is especially important since the more elements you have, the more information has to be translated (and is likely to get lost) over a loud club system. You’re far better off having the minimum number of excellently produced and mixed elements as you can get by with. 

4. Take Breaks, And Rest Your Ears Often. 

Taking regular breaks is important, especially when mixing. Not only does it prevent ear fatigue and reduce potential longer-term ear damage when listening at high volumes for long periods, but it acts as a kind of ‘ear reset’ so that once you go back to the mix, you should be able to hear different elements pop out at you. I’d recommend something like a 5 or 10-minute break after each hour of mixing. Keeping the volume at a reasonable level will assist you too. If your mix doesn’t sound right at a low volume, turning it up won’t help you. You might think it sounds better, but that’s a flaw in the way our brains process audio. I cannot stress the importance of keeping the volume at a comfortable level. It’s fine to kick it up at certain points to check for energy, or impact or clarity, but do this sparingly. Your ears, and neighbours, will thank you. 

5. Reach For The Reference Tracks.

Reference tracks have become an integral part of my mixing process. I personally buy all my music as AIFF files so that these same tracks can double as high-quality reference tracks, as well as being used in my DJ sets. Sometimes I’ll feel great when I’m A/B’ing a reference master that I really like, and I can hear that my track sounds pretty close to it, and sometimes it has the total opposite effect if I can hear that my mix isn’t sounding anything like it. It’s important to volume balance because of course, a mastered track is always going to be louder than the one you’re currently working on (unless you’ve got lots of processing on your master output). Sometimes I’ll use a compressor and a limiter to achieve a somewhat comparable volume while I’m mixing but for the most part I prefer to mix without these. 2 plugins I would recommend here are  ADAPTR Metric AB and Perception, and although both are perhaps aimed more at the mastering stage than the mixing stage, they’re really useful pieces of software that I utilise – both are easy to set up and both have the benefit of level matching your audio first so that you can hear if you’re actually improving your track, rather than just making it louder. 

6. Get To Know Your Room.

If you haven’t already realised, your mixing environment will lie to you. Unless you’re fortunate enough to be working in a purpose-built, perfectly treated and acoustically tuned space then your room will be interacting with and affecting the sound once it leaves the speakers. Simply put, sound waves travel from your monitors through the room, and then behave in a particular way depending on which surfaces they hit. Without getting deep into acoustics (a subject which is way beyond the scope of this article), this is something that you need to be aware of because the decisions you make when mixing will be based on the (most likely skewed) frequency response and behaviour of your mixing environment. This can lead to all sorts of issues in relation to bass levels, stereo width, comb filtering and so on. 

There are several ways that you can try to reduce the negative effects of the space you’re working in, and I’d recommend spending a little bit of time on this, especially as many people now are using spare bedrooms and basements, etc as project/home studios. If you’re starting out making music it’s highly unlikely that you’ll have given anywhere near as much thought to your mixing environment as you have to what monitors or interface you’d like to buy. You can ‘get away’ with not having a perfect room as long as you understand what’s going on with your room. So here’s my advice: 

    • Reference tracks – whilst sitting in your mix position, listen to lots of music, preferably in WAV or AIFF format from the same or similar genres and start to get a feel for how they sound in your room.
  •  
    • Consider purchasing a cheap measurement mic and running some sweeps using Fuzzmeasure or Sonarworks. The software is fairly pricey, but for both of these applications, there’s a free trial that you can use to give you an idea of the issues your room might be hiding. Even if you choose not to purchase, the measurements you get can still be helpful in knowing exactly where you stand in terms of frequency response. Sonarworks also do headphone calibration as well, which enables you to work on headphones much more confidently and achieve a result that’s much closer to what it would be if you were working on monitors.

    • A Subpac is a great solution for judging the low-end of your track. Whilst they’re not perfect (you’ll need to get the volume right by using reference tracks) and can be a little rattly when pushed too hard, they are useful for honing in on how your kick and bass are interacting and for giving you an idea of just how much low-end is below the frequency range that your monitors can pick up. ‘Feeling’ the music more closely to how you’d experience it in a club can also help you in getting a vibe from what you’re working on.
  •  
    • Lastly, having a great working relationship with a mastering engineer that you trust and can talk to openly about any mistakes you might be making or any improvements you can make, can be very helpful. I use Tank Edwards at Warm Audio Mastering who I speak to on a regular basis and who’s honest enough to tell me when there’s something I can fix in the mix to enable him to deliver a better master. In addition, he’s been to my studio so he has an understanding of my mixing environment and why I’m making the choices I am during mix sessions.

7. Observe The landscape.

‘Landscape’ is a term which I love to use as an analogy to mixing audio, because in the same way that you view a photo or painting when you listen to a sound recording you are hearing an audio landscape. Some parts of the recording might be close and upfront, and draw your focus (like vocals, or lead guitars), some may be panned left or right in the stereo field, and some may be way back in the distance (such as washed-out vocals, or subtle sound fx), and many of the sounds you hear will likely have been processed with the specific intention of making them ‘sit’ in a particular space in that picture. When we talk about ‘presence’ or ‘clarity’ or ‘stereo field’ what we really mean is ‘the space this element should occupy in relation to other elements’. Not every element of our mix can be upfront and draw our focus. Not every instrument in our mix can occupy the same space, sonically. Creating a sense of space and depth can be achieved by thinking of your audio in this way and I personally find that it actually makes things easier when you accept that not everything can be the focus, and doesn’t need to occupy a dominant space in your mix.

8. Find The Sweet Spot.

I believe that every instrument/channel in your mix has a ‘sweet spot’. A sweet spot from a mixing perspective is defined as being neither too loud nor too quiet – in other words, the optimal volume as it relates to its place in your audio landscape. A good way to find this sweet spot is to come up with a range for each track in your mix. You can do this slowly turning the channel down in volume until it feels too quiet, and you’re struggling to hear it. Make a note of that volume, because you know it’s not going to be any lower than that. Then, reset the channel back to where you initially had it, and turn it up, 1db at a time. Pretty quickly you’ll reach a point where it’s very obviously too loud. Make a note of this volume, because you know it won’t be any higher than that. Your ‘sweet spot’ for each channel or instrument is somewhere between these 2 points. You may also benefit from some subtractive eq when trying to get 2 parts to work together.

9. Create A Separate ‘Mixdown’ Project File.

When starting the mixing process, I’d recommend creating a ‘Mixdown’ version of your project file as an alternative so that if you wish to go back to the original and start over, then you have that option. I have been guilty of the overzealous processing of channels more times than I’d like to admit, and this has led to the track sounding unnatural, lifeless and too far away from the original feel and sound that I intended for the record. Having the original version and being able to ‘go back to the drawing board’ as it were, has been a lifesaver on many occasions. 

10.  Soothe Your (Resonant) Troubles Away.

Soothe 2 by Oeksound has been an absolute gamechanger for me. I cannot recommend this plugin highly enough. It’s one of those plugins, much like a couple I have from DMGAudio, that just make you go “Wow. How did I ever get by without this?” Oeksound describe it as a ‘dynamic resonance suppressor, which identifies problematic resonances on the fly and applies matching reduction automatically.’ In simple terms, it reduces harshness and sibilance, especially on hi-hats and vocals, and it does it in a way that’s constantly adjusting to the incoming audio (dynamic). It tames pianos and plucky instruments and can be used even as a creative sound design tool if pushed to its limits. Tip 10 is dedicated just to this plugin, it’s that good. 

And Finally: Perfect Doesn’t Exist, So Stop Chasing It.

Mixing, in it’s most simplistic form, is about actively listening to the audio coming from the speakers and then making decisions based on what you’re hearing. It’s about balancing the individual elements in a way that maximises the potential and emotion that you (or the producer of the record) intended. Like anything else, the more of this you do, the better at it you’ll become. It’s very easy to get lured in by the belief that spending more time on something will make it better, and very often this isn’t the case. There’s a famous story that Bruce Swedien tells about mixing Michael Jackson’s Billie Jean 91 times, before eventually going back to mix 2, which was the version released on the ‘Thriller’ album and is the one that we all know and love.

My point here is that even a record which we think of as perfect, probably isn’t to the people that made it, and they likely went through the same process of self-doubt that you are. The longer you spend on something, and the more you tweak it, the more you run the risk of losing perspective (and your sanity). For every record I’ve ever made, I could pick out 2 or 3 things which stick out to me as being ‘wrong’, or that I would have done differently, or that I feel could be improved. At some point, we have to commit to a mix being finished and let go of the fear of judgment that might come when we say “this is done. It’s finished.”