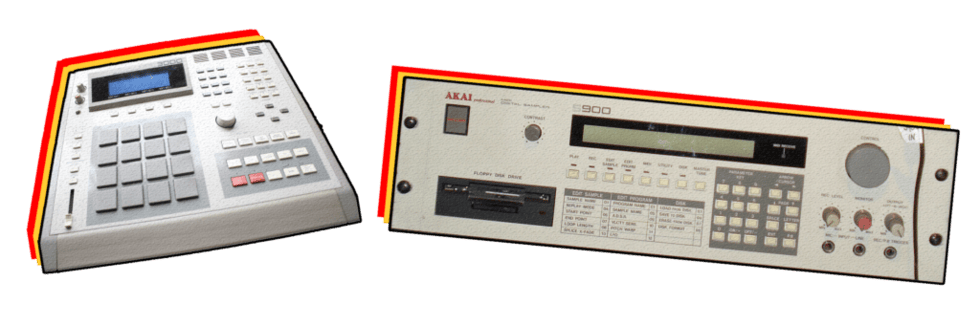
Digital sampling using your DAW is pretty standard these days but it was only a few years ago that every studio in the land had at least one or two hardware samplers in their equipment rack. Now though, the sampling capabilities offered by DAWs are only limited by their user’s imaginations (and copyright laws of course), so why would anyone want to buy an external sampling box with the inevitable compromises that small bits of gear bring? 

The answer only becomes clear once you physically try out a piece of hardware. There is still nothing that compares to jamming on a step sequencer, away from a computer screen, with a couple of encoders to tweak the filter and effects. It’s still one of the very best ways to come up with fresh ideas and its way more fun than fiddling with your trackpad or mouse. Working with a dedicated piece of hardware allows you to move away from visually fixating on the screen and the arrangement in front of you, and instead can facilitate the kind of intuitive, creative workflow that all producers desire. Jamming on a dedicated box creates a direct connection to the dance floor experience because you can ‘play’ it and move to the music, rather than operate it, which brings a physicality to the task that is hard to capture when sitting at a laptop. Dedicated external bits of kit also allow electronic producers to perform their work live, to improvise and create on the fly. 

With this in mind, we present the first of our sampler reviews, looking at three of the best samplers on the market for under €300. Here are the contenders:

Korg Volca Sample

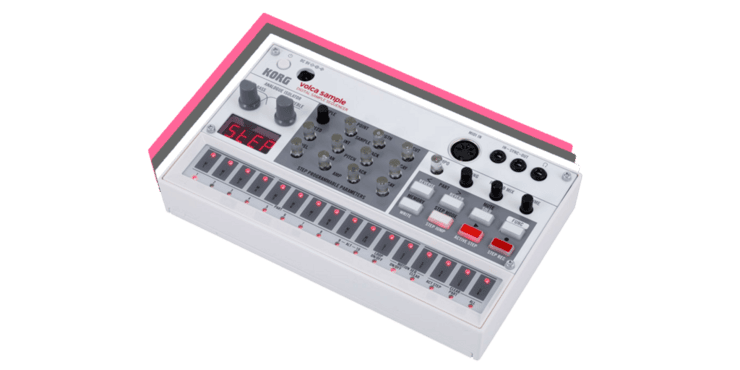
First up is the popular addition to the expanding Korg Volca family, the Korg Volca Sample, which is currently retailing for around £140. The Volca Sample is a small (it’s the size of a small book) but well-specced sample player with emphasis on live performance. It has no inbuilt sampling ability of its own, instead, you fill it with your own samples via either an iPhone or iPad. As with all the machines we’re looking at, the aim is to provide the user with as much tweakability from the front panel with minimum menu delving, to facilitate workflow. So you get a powerful 16 step sequencer, a bunch of tiny encoders to adjust various parameters and a basic ‘calculator’ LED screen to show parameter levels.

There are lots of decent sound manipulation possibilities, with accessible parameters for each of the Volca’s ten sample slots. You can instantly tweak the sample start point, playback speed, pitch envelope, level, pan, attack and decay, and samples can also be looped and reversed. This means that you can very quickly warp a sample beyond all recognition and opens up all sorts of creative avenues. 

In terms of effects, you get a single perfectly usable reverb – but these kinds of limitations are always a bad thing. In addition to the step programmer, squashy little pads and diminutive pots, there are two larger ‘analogue isolators’ for bass and treble, which provide an instant EQ boost or cut, and which are the only analogue part of the otherwise entirely digital Volca. Best of all in terms of creativity is that just like on their classic Electribe range, you can easily slip into motion sequence mode and record all your tweaks to the sequencer.The sample rate is 32kHz / 16 bit and the output – a  single 3.5 mm stereo mini-jack – is a little noisy, which all adds up to a pleasingly slightly crusty sound. 

Build quality is slight, but sturdy enough for live work. The Volca Sample can run on either six AA batteries or with an (un-supplied) mains adaptor. Samples are loaded in via an iPad or iPhone but of all the machines we’re looking at here, the Volca has the smallest memory with only 4MB. This, along with the fact that step sequencing doesn’t exactly lend itself to melodic composition, may mean that the Volca may be best suited to drum programming and abstract non-musical elements / FX.

Obviously, at this price point, there are going to be compromises – the Volca comes with a tinny inbuilt speaker, but it doesn’t really do the machine justice. In terms of connectivity, it only comes with a MIDI in, no out or through which would have been useful. Likewise, a stereo 1/4 jack output would have been more desirable than the 3.5mm stereo out. Some may find the 4MB of sample memory limiting but this misses the point of a machine like this, which is all about instant performance, improvisation and the joy of creating. With the Volca Sample, Korg has managed to scale down a substantial amount of functions into a tiny, effective and fun package, with an impressive amount of audio manipulation and mangling possibilities.

Akai MPX16

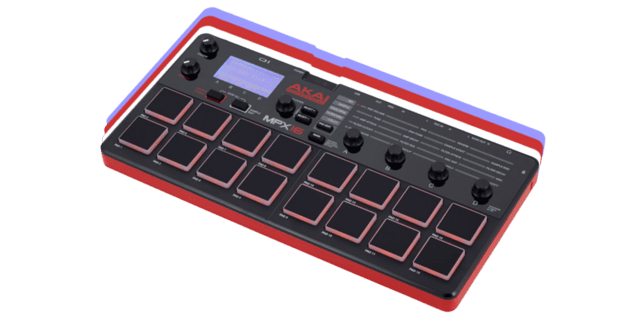
Retailing at around £160 the Akai MPX16 is described by Akai as a ‘compact sampling powerhouse’. It’s a great looking bit of kit, with 16 brightly coloured illuminated pads dominating the front panel. Samples are loaded via an SD card and you can load up to 48MB of your favourite samples at a time. The MPX16 will only play WAV files, but comes with drop and drag conversion software. You can also record samples via the stereo input or through the onboard mic. 

In terms of connectivity, the MPX16 connects via USB, has both MIDI in and out, and is powered by either USB or mains – and the mains adaptor is supplied too – meaning you can use it independently of a computer. It’s also nice to see full sized 1/4 inch jacks on the stereo ins and outs too, and there’s also a headphone socket. Regarding the MPX16’s MIDI implementation, unfortunately, the encoders don’t send MIDI CCs so you can’t record live knob tweaks to your external sequencer. 

When it comes to the all-important editing and mangling of your sounds, the MPX16 has four encoders on the front panel controls with a push-button matrix for selecting either tuning, pad groups, envelope control, panning, volume and of course filter cut off, resonance and envelope amount. Having four available knobs to tweak four available parameters means the MPX16 is particularly good for live jamming and improvisation. 

Maximum polyphony is 64 voices; you can loop your samples and the MPX16 also features non-destructive editing, so you can chop up a loop into little pieces, keeping some parts and discarding others with ease. Akai samplers were always highly praised for their filters, and the MPX16 comes with resonant 24dB low pass filters on each of the 16 pads. There’s also a reverb that you can adjust for each individual sample. Sample tweaking is easy and accessible but if you do need to delve into the menu, the MPX16’s screen is a backlit LCD display rather than the ‘calculator’ screens that are prevalent at this price point. 

The MPX16 also comes with a built-in stereo microphone for field recordings. This is a nice addition, but as ever with onboard mics, the one time that it might be really handy is if you’re out and about whereupon the mic’s sensitivity to physical movement and vibrations will be picked up and included in your recording. 

The build quality feels durable and the MPX16 integrates with ease with DAWs. Drawbacks, however, would have to include the slow sample loading time, which might be a problem for live performers. Overall, it’s a great-looking little box, very well suited for live performance and jamming. Plenty of onboard tweakability and with those Akai filters, you can squelch up your sounds with ease. 

Native Instruments Maschine Mikro MK2

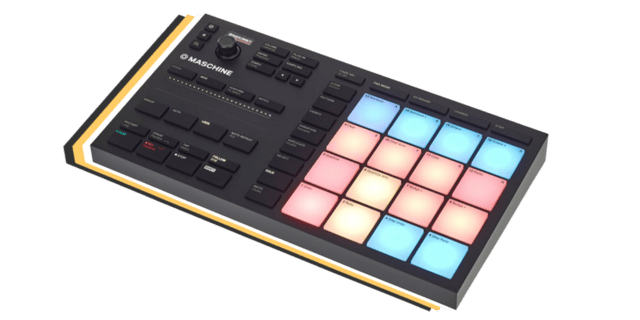
 Costing around £180, the Maschine Mikro is the priciest sampler we looked at. NI call it a ‘compact groove production studio’. It has substantially more functions than either the Volca or the MPX16, but can’t be used independently of your computer. What you get for your money is a cool looking little box with 16 enticing multicoloured lighted pads, a single encoder, lots of buttons and a decent backlit LCD screen. Best of all, it comes bundled with Maschine software and 6GB quality sounds, including 7000 one-shots, 400 loops, 300 drum kits and 388 sampled instruments. The Maschine software can run either under a DAW host or as a standalone, but you always need to use it in conjunction with a computer. An especially nice bonus is that the Mikro can host third-party plug-ins, which really opens up its potential. 

Again, it’s a box that has been designed to withstand the rigours of live use and feels solid and sturdy. The number of onscreen buttons speeds up workflow and generally, the Mikro is intuitive and easy to use. There are no MIDI ports, all connections are through USB. Although the largest of the three samplers we’ve looked at, it’s still highly portable, is light and will slip into your laptop bag with ease. 

The Mikro can claim to be a fully-fledged sampler rather than a sample player. It has 32 note polyphony and can sample at up to 24 bit 192kHz. However, if you prefer a more gritty approach, it can easily emulate older samplers like the MPC60 or SP1200. Unlike the other two boxes reviewed, it can take Rex files with ease. Perhaps the biggest factor in its favour (after the impressive bundled sounds and instruments) is the Mikro’s comprehensive effects section. It features 22 dedicated effects, including all the standard reverbs, delays and choruses, as well as more esoteric algorithms, and the potential for sound warping is huge. 

The combination of pads, buttons, a decent LCD screen and a large single encoder means that again, this machine has been designed with jamming and improvisation in mind. It’s also great at looping and can split an audio loop by either transients, musical division or a number of equal parts and distribute it over the pads for instant remixing. 

At this price point, the Mikro is a sleek looking and impressive option for live beat making and improvisation, as long as you don’t need a completely stand-alone device. 

The Verdict

The availability of well-specced, intuitive sample players at this price point has been a welcome addition to many studios and these three boxes are all strong contenders for your live or home set up. Whilst the consumer will always have to pay to get more functions, each box reviewed undoubtedly has it’s own strengths and charms. Your opinion on the Volca will probably depend on whether you like using a step sequencer or not, although the addition of a little analogue processing might sway you too. The Maschine Mikro has the most functionality and features but requires a computer. The Akai has more features and memory than the Volca, and those Akai filters, but has less audio manipulation options than the Mikro. 

For generating new ideas, composition on the fly and fully-fledged live performance, any of these three machines would provide you with plenty of opportunities to jam with your favourite samples and assist you in easily coming up with fresh ideas, and maybe even a chart-topping banger!


The UK Garage style of Cut-Up Vocals is one of the genre’s distinctive elements, and the skippy, soulful refrains can be an extremely effective technique that can really revitalise a remix or an original project. We look into producing your own cut-up vocal, UK Garage style.

The Garage cut-up vocal is a technique where a producer takes a vocal sample, slices it up into tiny parts and then re-constructs it into a staccato vocal melody, sometimes even mutating it so there are no actual recognisable words. It’s a sound which came to characterise UK Garage and has since been picked up and used in many other genres too.

A very early example of this technique is the vocal refrain in MK’s Dub of Doom of Nightcrawler’s ‘Push The Feeling On’ from 1992, a tune so successful that you can still hear it being played any weekend in clubs up and down the country. US producer Todd Edwards further developed the technique incorporating folk, disco and even samples of gregorian monks into his productions. Records like his 1996 release ‘Saved My Life’ feature a set of vocal samples that have been chopped up, filtered, panned, pitched and re-arranged, before being quantised in his distinctive skippy style. 

In the late nineties, Sunship picked up the baton, lending his immediately recognisable vocal reworking to the likes of Craig David, Mis-Teeq, M-Dubs, and so many others, with probably the best example also resulting in his biggest hit, ‘Flowers’ for Sweet Female Attitude.

There are two basic approaches to producing this effect – you either chop up your audio sample by hand, or, thanks to the power of modern technology,  you can let your software analyse the audio and chop it up for you. If you’re doing it by hand (which we’d recommend since that’s the authentic way) take the time to get in close when trimming the samples so that you aren’t leaving tiny gaps at the beginning of the clips, as these may start to be noticeable and result in sloppy timing when you come to quantising.  Any unintended gaps at the beginning of audio samples can lead to a naturally swung,rough groove that’s not in perfect time and so lends itself well to the sensibilities of garage. 

Vibes N’ That…

If you prefer, your DAW will happily assist you and make the process much simpler and take less time:  One quick method in Ableton LIVE is to right click an audio sample and select ‘Slice to New Midi Track’ – LIVE will analyse the audio and cut it up into slices (based on timing or on transients, you decide) giving you a pre-sliced set of vocals to jam with. In Logic you can use the transient detection engine by right-clicking on an audio sample and selecting ‘Convert Regions to New Sampler Track’, and again, you can specify to split the audio up by transients or by a specified note setting.  Alternatively, you can convert your audio to a REX file and map the individual slices to particular notes. 


This technique usually involves small snippets of sound rather than full sentences or even words – so the first task once you’ve chopped up your sample, is to listen through and see if you can identify any interesting sounds or textures you might want to use. And don’t ignore the parts between the words, the breaths and also the plosives (the ‘p’ sound at the beginning of a word) can be really punchy and form great little percussive details, especially when compressed. Use a combination of softer vowel sounds  and consonants which tend to be a bit more percussive. Ad-libs tend to be very useful for this purpose, since ad-libs are generally sung in the most emotive and expressive way and so lend themselves well to creating new, soulful phrases.

Once you’ve selected a few sounds, map them across your keyboard or assign them to the pads of your controller and you can jam along to your track or move them around on the screen while the track is playing to find something that works. This is very much trial and error but the beauty and fun here is that once you abandon the original meaning of the words there are no ‘wrong’ ways to do it. Once you’ve got a basic pattern down, you can experiment with adding additional layers of vocals to fill in any gaps. 

A little reverb or delay will help the vocal samples sit in the mix – but you might also want to consider processing each vocal part individually, applying different effects, panning, EQ or filtering to each clip. You could experiment with a long-tailed reverb on one part and a short gated verb on another, and then pan them opposite each other. A further step would then be to automate the effects so that the slices of vocal popping in and out of the mix mutate as the track plays – perhaps through a phaser with a slow envelope or an automated low pass filter. 

Pitch Perfect

Pitch shifting is another important big part of this technique. UK Garage was full of ‘chipmunk’ vocals, where the voice was artificially pitched-up to almost comical effect. But producers also began altering the pitch of individual vocal snippets. Applying individual pitch adjustments to your vocal slices changes the human voice into just another lead instrument that you can use to compose riffs or melodies with. Getting this to work in your productions will likely involve a little time – you’ll need to transpose individual sounds to change the melodic content and experiment in your piano roll window with moving the samples around to achieve a result you like. And remember you don’t just have to pitch vocals up, pitched down vocals can sound superb too, and the contrast between vocal clips that have been pitched up and down can sound particularly effective. 

A lot of producers will compress their sampled vocals heavily, to ensure that all the sounds are punchy, clear and cut through the mix. The human voice is notorious for having a large dynamic range, so, depending on the source material of course, it’s likely that your sampled vocals parts will benefit from some compression to even out the dynamics. 

Swings And Roundabouts

There is one more crucial element it achieving the Garage cut-up vocal sound, and that is quantisation. Once you warp the words so that they are no longer intelligible and turn the vocal sample into just another instrument, then you can quantise it to any setting you wish. Garage is characterised by its heavily swung rhythms and this swing is often applied to the cut-up vocals to give them that same skippy feel. When you’ve got your vocal snippets in place, try 16th note quantisation but with substantial swing – perhaps 60% – and see how it sounds. It’s really a question of personal preference and plenty of DAWs come with a number of different good quality quantise presets that are worth trying out too. To get the vocals sitting tight in the arrangement, use the same swing setting as you use for your drums, or lower the swing setting on the vocal samples for a looser feel. 

The human voice provides a rich tapestry of textures and rhythms for the producer, especially once you can move away from recognisable words into using the voice as just another piece of audio to be manipulated. Just listen to producers like Sunship, Scott Diaz, Four Tet or Burial, who’ve finessed and developed the chopped up vocal template in new exciting and emotive directions. 

Try chopping, pitching, panning, EQing and quantising some cut up vocals today, and see if you can get some of that UK Garage swagger and swing into your productions. Check out our selection of garage packs here. 


In this article, we’re going to look further at improving the sound of the low end in your productions. In particular, we are going to delve into EQ, one of the most important tools available to the producer, and look at basic mixing using parametric EQ. We recommend reading part 1 first if you haven’t yet done so – you can find it here.

EQ is the abbreviation of Equalisation and comes from the early 20th century when the tone of the human voice over a telegraph or telephone needed to be ‘equalised’. Now it refers to a control to change the tone of audio: specifically, it’s a filter that is able to cut or boost a particular section or frequency range of the audio spectrum. The bass and treble controls on a car stereo are a basic EQ (called a ‘shelving EQ) which allows you to boost at fixed frequencies either the ‘low end’ of the musical spectrum – the bass, or the ‘top end’ – the treble. The EQ available to producers, however, splits the audio spectrum up into much smaller sections than simply bass and treble and allows for far more precision and control than simply boosting.

The full human auditory spectrum, from the very lowest sounds that you can only really ‘feel’ rather than hear and up to the highest sounds that a human can perceive, is in the range of around 20Hz up to around 20kHz. All the sounds and samples you’ll be using in your productions will sit somewhere within this spectrum. The producer’s job is to get all the sounds to work as they want it to – to either cut through the mix, or sit quietly in the background, and to work with all the other sounds. EQ will be one of the main tools in this job, and you will grow to love your trusty EQs once you learn what they can do.

Two Golden Rules

There are a number of different types of EQ but when you’re working in a DAW, it’s likely that you’ll be using a parametric EQ. Parametric EQ allows you to select the frequency, bandwidth and gain. It’s the producer’s go-to tool to fix all sorts of production challenges. Need a little more slap from the congas? Too much sizzle on the hi-hats? A bit too much boom but not enough thud in the kick drum? These are all things that can be tackled using your EQ. But! …there are two golden rules to remember: 

  • Always try to fix the problem at the source first – EQ is a wonderful tool, but before you reach for the gain control,  it’s worth checking to see if you’ve chosen an appropriate sound. 
  • If you’re happy with the sound choice then it’s almost always preferable, at least in the first instance, to cut the EQ rather than boost.

You can think of creating a well-mixed track like creating a sonic jigsaw. Each sound – a beat, a loop, a bass line, a sample or a vocal – needs to fit neatly with all the others to create the whole. Putting a mix together can involve sculpting out spaces in the frequency spectrum for each part to sit in, depending on the complexity of the track in question, and your sound sources, amongst other things.  You can ‘sculpt’ this space by using EQ to remove parts of the audio spectrum that are un-needed, and that are getting in the way of other parts or bussed groups of parts. It’s way too easy to give a few little boosts to some parts in isolation and suddenly find yourself with an overcooked, bright or harsh sounding mix which will also eat away at your precious headroom. Far better to begin your mixdown by making cuts, cleaning up and decluttering. 

For example, you might want to make your bassline really cut through the mix. Instead of just using the EQ to add extra bass, it would make more sense to check other parts in the track and experiment with making EQ cuts at low and lower-mid frequencies to declutter the sonic space in which the bass is sitting. The trick is to work out what are the essential/fundamental parts of the sonic spectrum that the bassline ‘lives in’ – what frequency makes it sing – and then to check the other individual non-bass parts of your mix and see if you can cut some or all of this particular frequency area away from them without affecting them adversely.

Finding the ‘Sweet Spot’

To do this, you need to find the ‘sweet spot’ – the point in the frequency spectrum where the ‘heart’ of a sound is, the part which gives it its own personal character.  The standard method is to solo the part, in this example, we’re talking about a bassline, and use a Parametric EQ with a narrow bandwidth (or ‘Q’) setting and turn the boost right up. Then sweep the EQ all the way along the frequency spectrum and back again, until you find the part that you like and that contains the main character, the ‘sweet spot’, or the essence of that particular sound. Depending on our audio material, we might find that a boost at 100Hz gives our bassline some really nice fatness. So we then take the parametric EQ off the bass and listen to the other parts in the mix to see if any of them contain extraneous low-end information, particularly around 100Hz that you can cut without affecting their overall sound in the mix.

Instruments like pads and drones, and percussion, like toms, can contain lots of bass information that you can remove without it affecting the sound and impact of these parts in the mix. This then clears out a nice big space for your bassline to sit in. But even sounds that you perceive as being in the top frequencies (such as tambourines and shakers ) will likely have extra un-needed bass information too.

Once you’ve done this process, you may find that you don’t even need to ‘boost’ the bass at all. However, if you still feel you want more from your bassline, you can start to boost instead of cut. A boost at the sweet spot might work well. You might also find that a little boost in the lower mid area, perhaps between 800Hz and 2kHz might bring out some of the other harmonics in the bassline and give it a little punch and clarity. As we mentioned in part one, using overdrive or saturation is a fantastic way to add harmonics, helping the bass to be ‘heard’ on smaller playback systems (phones, laptops, computer speakers) as well as felt.

Knowing the ranges that instruments and voices occupy in the frequency spectrum is essential, and which frequencies you choose to boost or cut will be at least partly down to personal taste and of course, every track is different. Whether you boost or cut will be down to the particular sounds that you’re working with, and if these are samples whether they’ve had any prior processing, what source they were sampled from, and so on. So whilst there are no hard and fast rules, as the excellent chart above from Sweetwater shows there are some boost/cut points that tend to produce pleasing results.

  • 50Hz – Increase to add fullness to the lowest instruments or sounds in your mix like kick drums and basslines. Decrease in reduce ‘boominess’ in your basslines or kicks
  • 100Hz – Increase to add more ‘punch’ or ‘hardness’ to bass sounds. Reduce to increase clarity.
  • 200Hz – Increase to add fullness to snares, guitars, mid-range synths etc., reduce to decrease ‘muddiness’ in vocals or other mid-range sounds. 
  • 400Hz – A boost at 400Hz might add clarity to basslines, particularly at low volumes. A cut can reduce ‘boxiness’ of low-end sounds. 
  • 800Hz – Again, a boost around 800Hz can increase the clarity and punch of bass sounds. 

So that’s our introduction to using EQ on your bass sounds to deal with certain problems. In summary, we would always recommend that you try to fix any issue at the source first – choosing the right sounds can save you hours of frustration and work, and when you do use EQ, always try cutting some frequencies to deal with a problem before you boost.


Working with samples brings its own particular challenges. In this 2-part, beginners-guide article, we’re going to look at some of the bass-related problems that can arise when using samples in your productions, and how to fix them. Read Part 2 here.

The bass is one of the defining features of any dance track. The low end of the frequency spectrum is where the majority of the energy is going to be coming from when your track gets played on a club sound system, and how well it translates can make or break the reaction to the tune – so getting it right is essential. Whether you’re using analogue synths, VST’s or samples in your work, regardless of the source you’ll need to pay close attention to the bass. 

How Low Can You Go?

One of the great things about sampling is the instant mangling that you can do – just a couple of tweaks on a pitch shifter and a big dollop of reverb and you can turn a syrupy soul vocal into the dark satanic ghost of Barry White. Extreme pitch effects on vocals, making them either high-pitched ‘chipmunks’ or spooky rumbling monsters have been used for years in dance music, and to great effect – but any samples that have been substantially pitched down can be tricky for the home producer to handle. Perfect human hearing generally only goes down to 20Hz and your home monitors – unless you have a subwoofer – are probably only going to respond down to about 50Hz. A club sound system, however, will respond to bass frequencies lower than the range of human hearing.  

If it isn’t a bassline or a kick drum, then applying a high pass filter is a wise move – a simple roll off of everything between (approx.) 80-120Hz might be effective as there are often unintended low-end frequencies hanging out in other elements of your track too. Our advice is to go as high as you can without noticeably impacting the sound. Whenever you’re making adjustments to EQ or levels, it’s how things sound in the context of the entire track that’s important, not how they sound in isolation. A part that you’ve filtered the low end out of may sound a little thin and weedy on its own but fit just right within the context of the overall mix. You’ll also want to make sure that the kick and bass are in mono since having them in stereo can cause all sorts of phase issues and pretty much all club systems are in mono too. You can check this using various free imaging plugins and/or a mid/side processor.

If you’re having problems getting your kick and bassline to work together, consider making a cut on the kick drum, starting around 25hz and gradually increasing it. Unless you’re making very tough techno, you actually need much less of the kick than you think. You can also experiment with notching out frequencies around the 80/100hz mark which can help to tame some of the thud and thump. For example, In modern drum and bass, there’s a fetish for tightly controlled, punchy (but not heavy) kick drums. This allows so much more room for the bass to come through and provide the weight. As a second option, it’s often really useful to work on the rest of the parts first. Placing an EQ on all of the channels in your DAW and rolling off unwanted low-frequencies with a high pass filter on every channel except the kick and the bass is a good habit to get into, ensuring that there is nothing at all in the mix to interfere with the low end.

The Single Most Important Tool

When it comes to getting that low end right in your mixes, experience and your ears are the best tools and it’s worth taking the time to ‘train’ your ears, by listening to your own productions and comparing them to those of your favourite producers. How do the kick and bass interact? What’s the balance between them? Which of the 2 can you ‘feel’more? Do they happen together or does the bass play off the kick? This can really shed light on the relative levels of the different parts in a track, and help you to understand the balance and energy that’s needed – something that new producers often struggle with. 

One the best pieces of advice that you’ll hear again and again throughout your production career is to check your mixes in as many places as you can: on small computer speakers, studio monitors, headphones, the cheap mp3 player in the kitchen and of course the classic ‘car test’. All of these locations will give you different feedback on how effective your low end is, not to mention the rest of your mix. If you get it sounding good in all those places, there’s a good chance it will translate well anywhere. The big test, of course, is a club system, so if you can, try and find someone who’ll let you road-test your stuff on a big rig; you may be amazed at how different it sounds to how it sounded in your studio. 

What Does Your Room Sound Like?

Stepping away from the screen for a moment, room acoustics are essential to decision-making within the production process and to accurate bass mixing too. Whilst you may not be able to professionally acoustically treat your room at home, you can at least always ensure that you and your monitors are all sitting at the corners of an equilateral triangle, which will assist substantially with hearing the ‘true’ sound coming out of the monitors. Soft furnishing and wall hangings can help dampen unhelpful sound reflections too, but it’s learning how your room actually behaves that is the most crucial thing here. If you have a good idea of how the shape and nature of your room affects what your music sounds like, then this will be a huge help when producing and making critical decisions. Again, this information is learned by listening and comparing in other environments, and then going back and adjusting your mix accordingly. 


Another low-end issue that can affect samples is this: you scour your Dad’s old records and finally find a cool snippet of audio – it’s got drums, it’s got bass but most importantly it’s got a superb groove. So far, we’re winning. So you sample it, chop it, edit it and loop it and it’s sounding great – until you compare it to a contemporary song when you realise that older tracks often lack the power and impact of modern recordings: they simply don’t have the huge, precision-engineered low end that we’re used to, and so it sounds thin in comparison. You can encounter a similar issue if you pitch a sample up: you start to lose bass information and it starts to sound thin and weak. In this situation, before you start reaching for the bass EQ, you could try a couple of other things: 

If it’s a bassline or full track groove that you’ve sampled, you could try playing a sub-bass underneath it – this will increase the low-end impact without affecting the character of the sample – although you’ll need to play it very tightly to make it work. The second, and easier option might be to try using a bass-enhancer plugin – most DAWs come with bass enhancers and of course, there are plenty of external plugins available that will do the same job of generating lower end harmonics to beef up your bass. 

There’s More To Bass Than Meets The Ear

Another thing that is useful to remember is that bass and kick drum samples don’t just contain bass frequencies, they are often rich in harmonics and aside from their fundamental frequency will often have lots of other sonic information present as well, including plenty of mid-range and sometimes even some top end too. Experiment with gentle, narrow mid-range EQ boosts to see if that gives your bass sound that extra impact you’re looking for. Alternatively, you could apply some distortion, overdrive or saturation which can introduce some higher frequency content to help the sound cut through the mix. Logic’s stock overdrive is great for this, and generally speaking, tape emulation plugins such as U-he Satin, or UA’s Studer A800 do an excellent job at adding some harmonics.

Getting the low end right is essential if you want to make tunes that seriously bang in the club. There’s no one easy trick, it’s a combination of a number of small techniques that add up to great sounding bass. We have only briefly touched on EQ which we’ll delve deeper into in part 2. Meanwhile, if you’re just starting out in your production career, we recommend that you: start to train your ears, listen to your work on lots of different speakers, and compare your tracks to those by your favourite producers. Do these three things and you’ll definitely be on the right track. 

Click here to read part 2…


Sampling is a significant part of the audio landscape now, but there was a time when it was utterly revolutionary. Indeed, there’s a strong argument to be made that sampling, and the advent of the sampler, was the most radical development in the history of 20th century recorded music. The ability to take a piece of someone else’s recorded audio and use it in your own composition completely transformed the process of making music and was a substantial contributing factor in the birth and evolution of dance and electronic music. Entire genres have been built around just a few samples and a drum machine or sampled drum beat – see French house, techno and hip hop. Jungle/Drum & Bass leant heavily on the use of funk breaks and the ‘Hot Pants’, ‘Apache’, ‘Funky Drummer’, and ‘Think’ breaks as well as the now-ubiquitous ‘Amen’ break – the origin and importance of which much has been written (including a couple of excellent documentaries)


Although artists like the Beatles and others had used tape loops on their records back in the 1960s, it wasn’t until the 1980s that sampling technology caught up with the desires of producers and artists. However, in 1980 you’d need to pay around £20,000 to buy a Fairlight CMI, a digital synth which also contained a rudimentary sampler. But hardware samplers soon dropped in price and increased in functionality. The Akai S-Series of samplers arrived in 1986, just in time to assist Techno, Acid House, Hardcore and Jungle to bloom and develop into the countless sub-genres we have today and it was quickly followed by the iconic MPC, famously used by J-Dilla, Pete Rock and DJ Shadow and responsible for many a hip hop anthem. Whether you know it or not, no matter what type of dance or electronic music you enjoy, Hip Hop, Techno, Jungle, UK Garage or House – you can be almost certain it’s full of samples.Sample It, Chop It, Loop It!

Now, of course, software samplers are standard across all DAWs, and even iOS apps, and it’s an oft-quoted statistic that the processing power we all carry round in just our phones is way more powerful than the computers that got us to the moon and back. Modern software samplers are characterised by the ease by which we can sample any audio and incorporate it into our own work. Pitch, tempo, style – nothing is a barrier – the software will aid you in manipulating almost sample to fit in your track with the minimum of fuss.

All of this means that the landscape of music has altered significantly in the last 30 years, with new technology enabling musicians, producers and consumers to create and interact in new, exciting ways. Nowhere is this more true than in electronic music, where the DJs’ role has now fully merged with that of the producer, with DJs often making use of sampling, looping and re-edits in their sets and many of them releasing music largely based on the grooves and loops of older tracks. This is where legal issues become relevant.

The major issue around sampling is that using another person’s original recordings without their permission constitutes a copyright infringement, for which there will likely be legal consequences. Court cases and claims may well prevent you from ever earning a penny from the work containing the infringing sample if it isn’t cleared in advance. The central issue is covered by the UK Copyright Designs and Patents Act 1988, and can be summed up succinctly as “If it’s not yours, you don’t have the right to use it without permission”. To understand exactly what we can and can’t legally sample, we need to look at this in a little more detail.

The Legal Bit…

The Copyright, Designs and Patents Act 1988 is a set of laws that dictate how creators can control the ways their material can be used (in the UK, under UK law). When a producer uses someone else’s sound recording without their prior permission – ie: when they sample a loop, vocal, instrument, drum beat or even just a single note from someone else’s work – in legal terms it is considered to be:

  1. A breach of copyright in the original sound recording,
  2. A breach of copyright in the music (and lyrics, if lyrics have been sampled),
  3. An unauthorised use of the performances in the original work.

This applies, in theory at least, in all of the following cases:

  • Even if you only used a tiny snippet.
  • Even if you buried it under other lots of other programmed parts.
  • Even if you reversed it, pitched it down and processed it through every single effect you own.
  • Even if you’re pretty sure no one will notice it.

In UK law, we use the doctrine of “substantial similarity”, which means that a substantial part of the copyrighted piece of music has to have been used in order for there to be an infringement. In practice, this might mean that if you sample a single horn hit from someone else’s tune and use it in one of your productions, you might get away with it – but you should know that all major record companies have entire departments, peopled by professional researchers, musicologists and lawyers, whose job it is to find sample infractions and to collect money for them. And if that horn stab was from a famous song, made a substantial contribution to your track, and you’ve not asked for permission, then legally you’ll not have a leg to stand on. There are also ethical and professional considerations too – we wouldn’t like it if someone profited from our work without crediting and remunerating us, so should surely show others the same professional respect as well.

Read The Small Print!

As a general rule of thumb, it’s very likely that any record contract you sign will require you to indemnify (protect) the label against any potential claims arising from copyright infringement. This means that it’s your responsibility to ensure that any samples have been cleared. So you’ll need the permission of the record label and usually the publisher too before you release any sound recording containing the sample. It might be that if the copyright wasn’t assigned to a publisher then you’ll need to track down the original copyright owners – or even their heirs – and bear in mind that some songs have more than one writer, so this can be quite a lengthy process.

It’s common practice these days to employ a sample clearing company who can negotiate a usage rate for you with the record label or publisher – and this is far more sensible than waiting until your tune blows up big and then asking for permission as you will have already broken the law. If you didn’t ask for permission and your tune blows up, it’s entirely possible that the record company legal team will attempt to get a higher percentage, perhaps even 100% of the royalties, than if you’d sought permission. There are also sample replay companies who specialise in uber-authentic recreations of pretty much any record you can imagine. Scorccio‘s recreations are so good, they often have the rightsholder going after the label because they are utterly convinced it’s the original recording.

A sample clearing company will charge you a flat rate and attempt to get you the best deal available. Remember, record companies want to make money, so it’s usually in their interest to strike a deal with people who sample their catalogue. All these considerations shouldn’t deter you from sampling – the big companies are set up for this stuff – you just have to do things the right way. The deal you get will depend on how much of the copyrighted audio you used, how well known the original recording was, the prominence of the sample and the likelihood of your release being successful.

Of course, none of these restrictions apply to legally bought sample packs. When you pay for a sample pack you are paying for a licence to freely use the samples in your own compositions. You can build a track entirely from legally bought samples and even if it’s a huge hit, you won’t have to pay anything provided you purchased the sounds legally to begin with. This is the big advantage of using royalty-free samples over other original published works – once you’ve paid for it, it’s yours. 

There are some limits here though, and again, the law is very clear on this. Most sample providers will have some variation of the following guidelines about what you can and can’t do with the samples you buy: you can use the samples in your own compositions, but you can’t sell, loan, rent, lease, assign, or transfer samples to another user, or use them in any competitive product and potentially library music (although this varies between companies and products). So this means that the licence is non-transferable and you are not allowed to share your sample pack with the rest of the internet or try to sell them as if they were your own.

So that’s our basic guide to the legalities of sampling. We hope you find it useful. If in doubt, you should always seek the advice of the Musicians Union or talk to any of the sample clearance companies online and if you do choose to release a record that contains a sample, our lawyers have advised us to advise you that this article does not constitute legal advice and does not take the place of a qualified music attorney.

Click here to browse our full range of royalty-free collections. 


Continue reading A Guide To The Law & Sampling